

Some pretty good looking bricks!
Finally the day has come to make mud bricks! YAY! I was not able to sleep at all last night due to the anticipation and the anxiety over doing an actual mud brick training, but now that the morning is finally here I am more than ready to do this.
The head of the camp has asked that representatives from all of the different sectors come to participate in the trainings and then help to make all of the bricks for the final building. Hopefully the same people who helped to make the bricks will be back in May when we build the final structure so they can see the whole process.
The day started by 19 volunteers, the 2nd in Charge, the TB lab tech, Mweh Paw, and myself gathering around our large mud pit. There I started by explaining how to decide on what soil to use and how you know when the soil you have picked is appropriate to use. I suggested that three tests of visual, smell, and touch can help you identify the basic properties of if a soil can be used for mud brick making. Simply put the visual test helps you to see the homogeneity of the soil you have, the smell test helps you decide if there is organic material that could possibly corrupt your mud brick mixture integrity, and the touch test helps you decide if the mixture is mostly sand or clay, which then effects what additives are necessary.
On top of these three basic tests there are two more tests that can help with the understanding of the soil you are working with and most importantly what might need to be added to make the final mud brick mixture stronger. The first test involves getting the soil sample slightly wet and then rolling into a palm sized ball. Once the ball is rolled you then smash the ball against the palm of your hand and see how much water leaks out and how the flattened ball looks when deformed. If little to no water comes out that means that the mixture is mostly clay, unlike with sand where the water would freely leak out, it also tells you how the soil will act when the water in the mud brick mixture starts to evaporate. Will it crumple into small pieces or bind together? These are important things to know especially for the next test which is where you roll the hydrated soil sample into a long skinny log, and by holding it only on one end, see how far you can cantilever the other end before it breaks. If the piece breaks between 5cm and 15cm then the soil you have is good soil to use for mud brick making. These were the main tenants that I put out there as easy ways to see if you have suitable soil.
Here in the camp the soil is mostly clay and very homogenous, we then talked about what you might need to add to a clay type soil in order to make it stronger. Clay type soils are great for making mud bricks, since they are very cohesive and do not shrink much when drying, however they do need to have an additive of some sort to give the bricks tensile strength. For this training session I decided to show the volunteers how to make bricks using both bamboo and straw to try to reinforce the idea that almost any type of organic fiberus material can be used as an additive. This project is not only about teaching how to make and build with mud bricks, but also showing how it is a cheap way to build with all local materials.
So after a little tea and overly sweet coffee break it was finally time to get dirty! I started by showing them how to make a bamboo brick, since we were doing bamboo bricks in the morning and straw bricks in the evening. I started by lining the bottom of the hole with bamboo cuttings and then adding the soil that I had already previously prepared. The soil preparation that I had done earlier was simply taking out any large rocks and plants and then making sure that there were no large clumps of soil that would not become fully saturated with water when I was mixing it with the bamboo and therefore weaken the final mud bricks. I then slowly stated to add water and need the mixture until the bamboo pieces were spread out evening in the soil. I constantly kept making the mud into a ball form and then breaking open the middle of that ball to check that the mixture was wet all the way through, that there were no soil clumps that were still dry, and that the mixture had become a cohesive combination of both soil and bamboo.

Preparing the soil by breaking up the large soil pieces so they will mix better
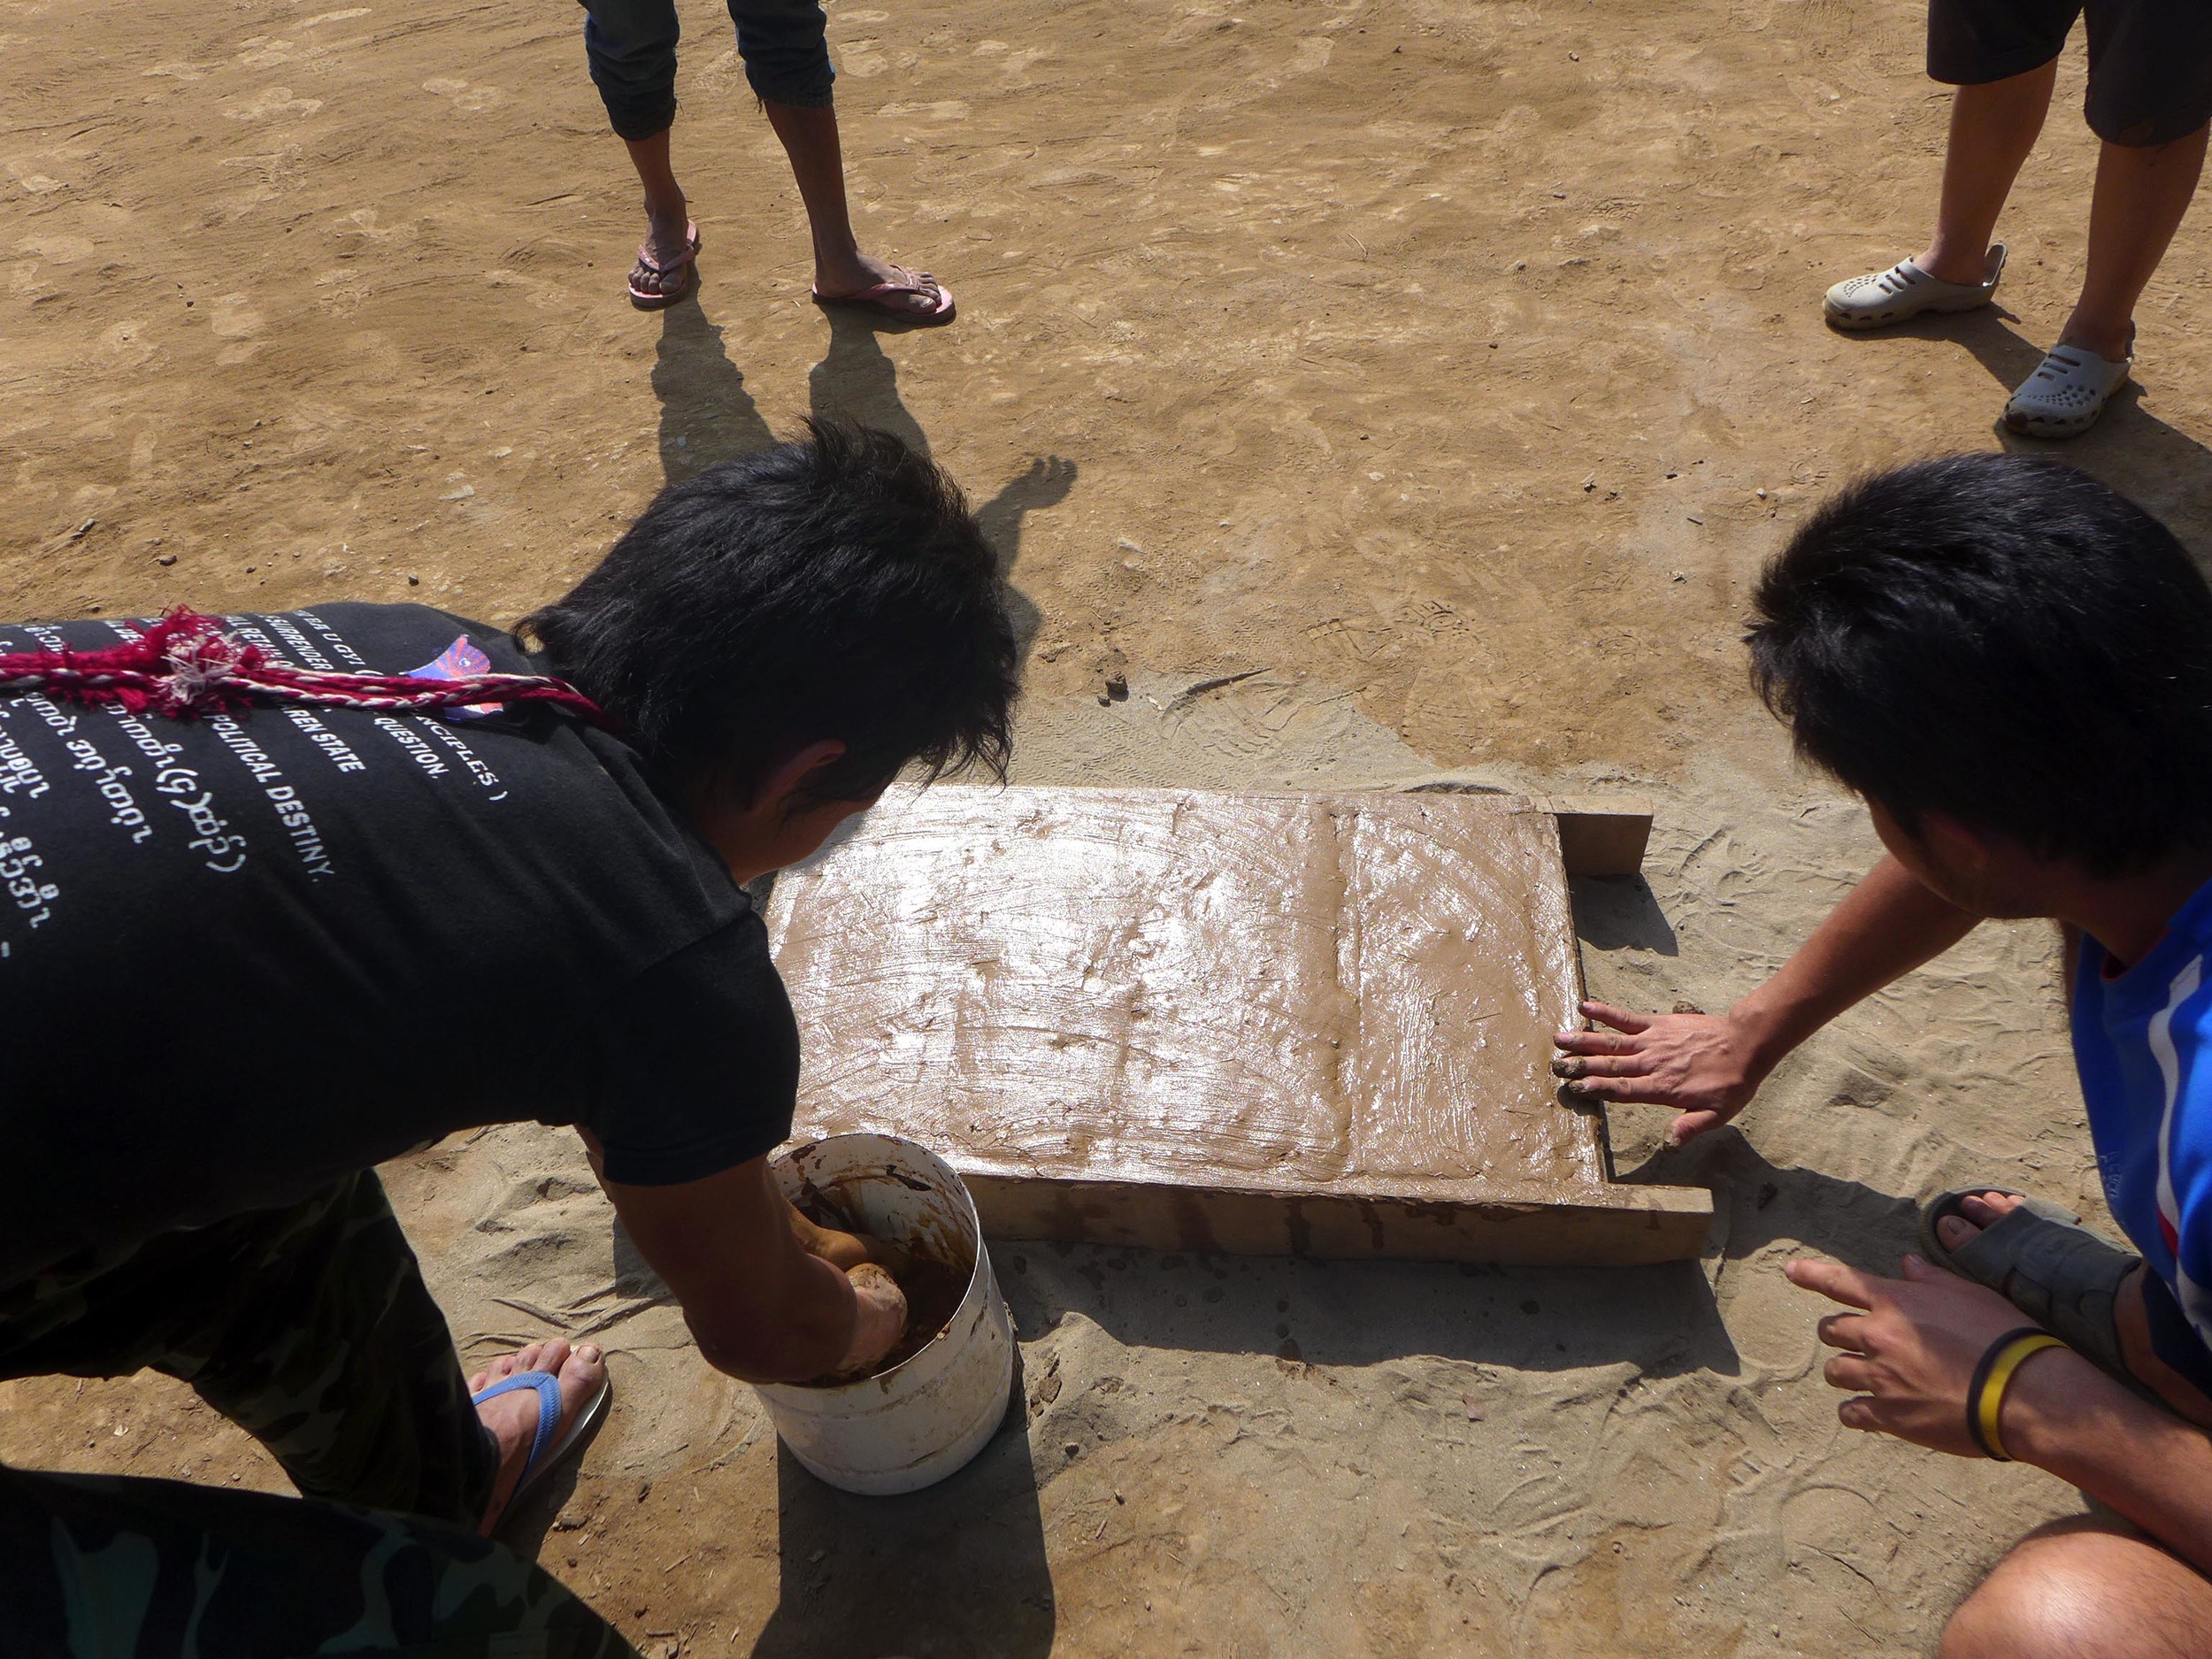
It was finally time for the mold. After soaking the mold in water and then lining it with sand to help with the release I started to pack the mud mixture inside, taking extra care to get fully into the corners and explain that the bricks cannot have various striations of mud that are not bound together, but instead need to me one solid piece. Then it was time for the release- if I thought it was going to be embarrassing before for the brick to not come out this was going to be ten times worse if I failed during my own training! – luckily it came out with the bamboo mixture, but when it came to releasing the straw mixture no go. I had to finally push it out with my hand and then do a little post-mold by hand

Mud Brick tests the brick on the left is a bamboo mixture and the brick on the right is the straw mixture
After my short little how to’s it was time for them to try. Happily mud brick making isn’t an exact process where everything needs to measured perfectly. As long as the final mud brick mixture has the fiberous materials evenly spread throughout the mixture you are pretty good to go. At first everyone kept asking me to look at the amount of bamboo they were putting in or the amount of water being use or if it was well mixed, but pretty quickly people got the hang of it and intuitively knew what to do.

Mixing the bamboo and mud by hand, because bamboo is too sharp to mix with your feet
Most importantly soon the 2nd in Charge was taking over and giving out instructions to add more bamboo or mix more in that area; for me that is a sign that everything was going to be ok. Since I wasn’t going to be there for when they made all of the bricks I needed to know that I could leave it in the hands of someone that would feel confident taking charge of the process.

Placing the bamboo mud brick mixture into the molds and making sure to get way into the corners
After a large batch of the mixture was ready it was time to bring it over to where we were going to be making the bricks and leaving them to dry for about 30 days. We had made 4 large brick molds and after soaking them in the river we then liberally coated with sand. Each mold could make either 4 or 5 bricks and we started to load in the mixture before it became too desiccated from being in the sun. After loading the first mold it was time for the release.
Our first mold done and ready to try the release
It quickly became clear that a simple shaking motion used in my smaller molds was not going to do it, but the 2nd in Charge knew exactly what to do; grabbing a bamboo stick he started to tap the mold until the bricks released! Low and behold we had our first bricks and they were beautiful! I was like a proud mama seeing those first beauties come out.

Our first bricks and don’t they look oh so perfect?
After the first 5 bricks were made everyone knew what to do and went to it. There were enough molds to go around with each having a few people work on filling them with the mud brick mixture and soon we were cranking out bricks. Since we were working in the direct sun and once the bricks come out of the mold they must not be moved for 30 days it was important that we covered our newly made bricks with banana leaves so that the sun did not dry the bricks unevenly and therefore lead to cracking.
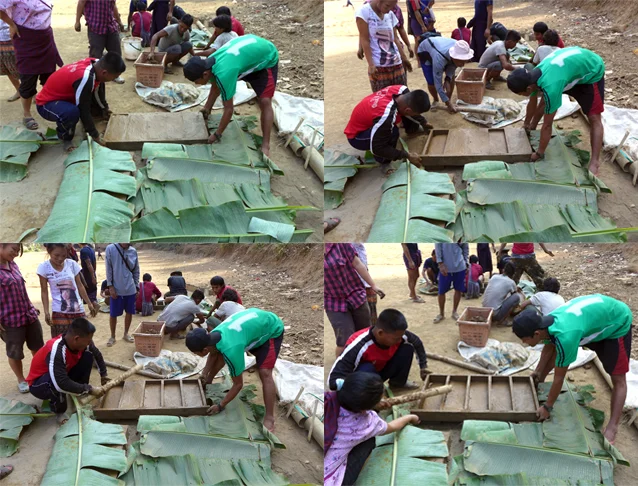
Mold release sequence
At around noon we decided to take a 1 hour lunch break and meet back to start the straw bricks. By 1pm the sun had already moved behind most of the mountains so we were now working in the shade which was much nicer! Now it was time for the straw bricks, which are much faster to make because you can use your feet to mix the straw with the mud instead of your hands. When I jumped into the mud pit and started stamping around to mix the straw and mud together they all nearly died laughing, but after a while finally I got someone to join me! The straw is also much easier to fit into the molds and therefore forming the bricks goes much faster.

Mixing the straw and mud with our feet
By 3pm we had managed to make 102 bricks and were happy to call it a day. After a cold bucket shower it was then off to a meeting with the Head of the Camp and the 2nd in Charge to go over the final details before I left the camp tomorrow. Going over the exact site for the new lab, its dimensions, the timber that needed to be bought and how to care for the mud bricks left me feeling confident that when I return in May we will be ready to start the building phase of this project.

The straw mixture goes about twice as fast when placing into the molds because it is much more malleable than the bamboo mixture
By dinner time both Mweh Paw and myself were pretty tired, but we were both excited by what we had accomplished today. Not only had we successfully made 102 bricks and taught 19 people from all the different sectors how to pick good mud brick soil and care for the bricks, but by the end of the day it was not myself who was in charge of the process but the 2nd in Charge and Mweh Paw. As far as an effort to build capacity on how to make mud bricks I am happy to report that that goal was definitely accomplished!
